How to Make Gingerbread House
Step by Step, with Photos!
Click here for a PDF print version of the instructions and click here for a PDF print version of the templates
 A
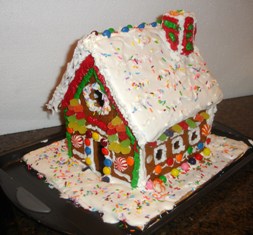
home-made gingerbread house seems like a daunting task, but in reality, it's
quite easy! Especially with these step-by-step instructions, with
photographs to illustrate each step, from making the gingerbread walls and roof
and snow, the roof icing to decorating. I've also made all the templates for
you. They're full size, so you just print them out and cut them along the lines! Finally, with the
openings for the doors and windows, you can even put a small light inside, so
your gingerbread house lights up!
A
home-made gingerbread house seems like a daunting task, but in reality, it's
quite easy! Especially with these step-by-step instructions, with
photographs to illustrate each step, from making the gingerbread walls and roof
and snow, the roof icing to decorating. I've also made all the templates for
you. They're full size, so you just print them out and cut them along the lines! Finally, with the
openings for the doors and windows, you can even put a small light inside, so
your gingerbread house lights up!
It's really quite easy - my 2 1/2 year old helped and had a great time! And if you want to make gingerbread men cookies, see this page
- they're even easier!
And if you want to make gingerbread men cookies, see this page
- they're even easier!
The keys to success are simple:
- Gather all the ingredients before you start
- Allow the recommended time for the icing "glue" to harden
- Remember that the goal is to make a storybook fantasy house and have
fun... don't get too perfectionist about the architecture!
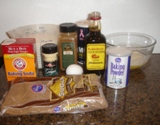
Step 1 - Gather the Ingredients and Supplies
- A pattern (see step 1) for the front, back and side walls, roof and
chimney. (click here for a pdf file that you can print to use for the templates
- NO
drawing or required - just cut on the lines!)
- Gingerbread dough
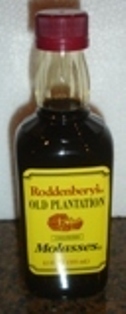
- 1 and 1/2 cups (12 fl oz or 350 ml )(usually, that's 1 bottle) of unsulphured molasses (in the UK, this is called treacle)
- 1 and 1/2 cup (3 sticks) butter or margarine (each stick is 113 grams, so that's about 350 g, altogether)
- 8 cups all-purpose flour
- 2 tablespoons double-acting baking powder
- 1/2 teaspoon salt
- 1 teaspoon baking soda (also called bicarbonate of soda)
- 4 teaspoons ground ginger
- 4 teaspoons ground cinnamon
- 1 tablespoon allspice
- 1 and 1/2 cups brown sugar (dark or light)
- 2 large eggs
- Icing
- 4 egg whites
- 1 teaspoons cream of tartar
- 4 cups of confectioner's sugar (also called icing sugar or powdered sugar)
- cookie sheets
- aluminum foil or better yet, silicon baking mats
- butter or margarine
- flour, all-purpose, white or whole wheat
- Again, more silicon banking mats OR waxed paper
- Heavy duty mixer (optional - you can mix by hand)
- Rolling pin, I like the non-stick silicon type
- Cake knives
- Spatula
- Cooling racks
- a 11" by 17" cookie tray, heavy cardboard and/or plywood to use as a base
- Six quart-sized bottles (like full spaghetti sauce jars) or unopened soda cans to hold the walls and roof in place while the icing dries.
- Pastry bags and tips (OR a gallon sized Ziploc plastic bag (quart will do, also)
- Candies: M&M's, gumdrops, lifesavers, colored sprinkles, etc.
Step 2 - Print and Cut Out the Stencils
I've seen some miserable directions for making the patterns/stencils, so complicated, they looked like a college geometry exam! So, instead of giving you measurements, a ruler, a protractor and instructing you on making right triangles to superimpose on trapezoids... I've already made the templates for you, put them in a printable pdf file! All you need to do isclick here (which will open a new window) and then print the file that comes up. Then close that page and you will return here!If your printer can
handle stiff or heavyweight paper, so much the better; use that, but plain paper
will do, too. Just print the templates, then cut them out along the heavy solid
lines, including the doors and windows. Notice that you really need only one of
each roof pieces and the side (since the two long sides and two roof pieces are
each identical), and you will reuse them!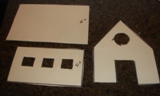
The pdf file includes templates for
Making the dough
No, don't run off to you job and try to earn more; we're actually making dough, just like the funny man making the doughnuts. Ok, so you're not old enough to remember that commercial...!
Step 3 - Get the dough ingredients ready
Here's what you'll need:
- 1 and 1/2 cups (12 fl oz )(usually, that's 1 bottle) of unsulphured molasses
- 1 and 1/2 cup (3 sticks) butter or margarine
- 8 cups all-purpose flour
- 2 teaspoon double-acting baking powder
- 1/2 teaspoon salt
- 1 teaspoon baking soda
- 4 teaspoons ground ginger
- 4 teaspoons ground cinnamon
- 1 tablespoon allspice
- 1 and 1/2 cups brown sugar (dark or light)
- 2 large eggs
Step 4 - Turn the oven on
Now's
a good time to get your oven pre-heating to 350 F (175 C)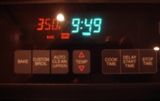
Step 5 - Melt the butter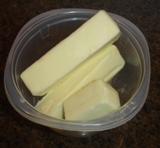
Melt the butter in the microwave or stovetop until just barely melted.
You might also warm the molasses so it pours and mixes more easily (remember the expression "slow as molasses?). You can heat it in the microwave (with the lid removed) for 45 seconds, or let it sit in a pot of very warm, almost hot, water for 30 minutes.
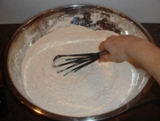
Step 6 - Mix the butter and molasses
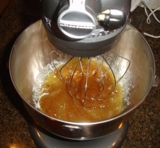
Pour the melted butter and molasses into your mixing bowl (a large one!)
Step 7 - add the eggs and brown sugar
 Now add the eggs, and next the brown sugar!
Note how I switched
Now add the eggs, and next the brown sugar!
Note how I switched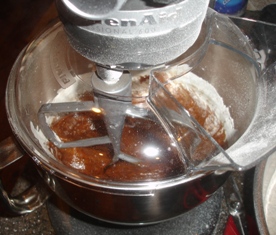 from a whisk to a heavy beater on the mixer.
Step 8 - Separately mix the dry ingredients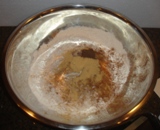
In another large bowl mix the
- 8 cups all-purpose flour
- 2 teaspoon double-acting baking powder
- 1/2 teaspoon salt
- 1 teaspoon baking soda
- 4 teaspoons ground ginger
- 4 teaspoons ground cinnamon
- 1 tablespoon allspice
Step 9 - Add the flour to the wet ingredients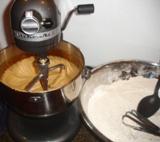
If you have a mixer with a dough hook, it is time to put that on. Otherwise, you'll need to (knead to) do this by hand!
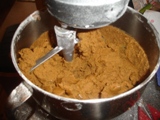
Done mixing
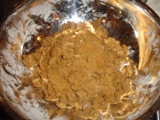
Back into the bowl and knead it into a smooth ball.
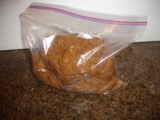 Step
10 - Chill!
Step
10 - Chill!
The dough, that is. No time for you to relax, yet. Put the dough in a ziploc or other container and refrigerate at least 30 minutes. Most directions say that you can even leave it till the next day, and I'm sure you can, but that's not necessary.
Step 11 - Prepare the platform or base
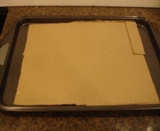 Now
is a good time to prepare a base to build the house on. I just cut the
side of a cardboard box to fit inside a baking pan or cookie sheet with a lip
around it. I've heard some people use a piece of plywood, and that's great if
you have one lying around...
Now
is a good time to prepare a base to build the house on. I just cut the
side of a cardboard box to fit inside a baking pan or cookie sheet with a lip
around it. I've heard some people use a piece of plywood, and that's great if
you have one lying around...
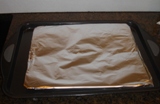 Then,
I covered the cardboard in a sheet of heavy aluminum foil. I put the
shiny side down, so it wouldn't be TOO reflective (for photos).
Then,
I covered the cardboard in a sheet of heavy aluminum foil. I put the
shiny side down, so it wouldn't be TOO reflective (for photos).
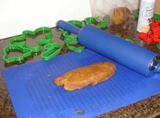
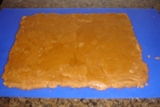
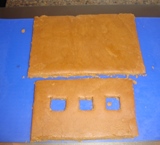
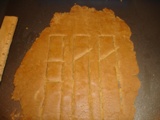
Step 12 - Roll out some dough
On a silicon baking mat, waxed paper or a floured surface, roll out a small amount of the dough (about the size of a tennis ball) until it is about 1/4 inch thick. Don't get carried away trying to measure it, gingerbread is pretty tough stuff, so it can be as thin as 1/8 in some places or as thick as 1/2 inch, but 1/4 inch (1/2 cm for those of you in other countries) is ideal.
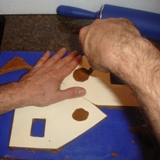
Step 13 - Match a template cutout to the rolled dough
 Try
to match one one or more of the cut out patterns to the size of the rolled
dough. It doesn't need to be an exact fit, you will reuse the trimmings.
And don't worry about making the rolled out dough any precise shape (rectangle,
circle - just as long as it is bigger than one or more templates, that will do.
Try
to match one one or more of the cut out patterns to the size of the rolled
dough. It doesn't need to be an exact fit, you will reuse the trimmings.
And don't worry about making the rolled out dough any precise shape (rectangle,
circle - just as long as it is bigger than one or more templates, that will do.
Just place one of the paper pattern pieces on the dough and using a dull knife (like a table knife) cut around the edges.
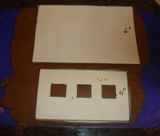
Step 14 - Cutting out doors and windows
 Cut
out the windows and doors and just lift out the extra dough. Save the trimming
to roll again for the next template.
Cut
out the windows and doors and just lift out the extra dough. Save the trimming
to roll again for the next template.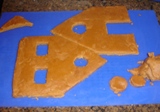
Now, here is why I like using the silicon baking mats. I can just lift the mats with the dough pieces on it, and lay it on the cookie sheet.
Or lay the cookie sheet over it then turn it over - if you need to reuse the cookie sheet for the next batch.
Here's a tip on windows: you can fill the empty window holes with crushed life-savers to form stained glass windows! It will melt in the oven and fuse to make "glass" panes!
Step 15 - Making the chimney
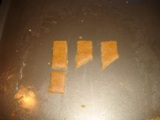 Making
the Chimney - The chimney pieces are no different from the others, just smaller!
You don't need to make a chimney, but it adds a nice touch. I will admit that
they are a pain in the neck to get to stay glued in place until the glue sets.
More about that later.
Making
the Chimney - The chimney pieces are no different from the others, just smaller!
You don't need to make a chimney, but it adds a nice touch. I will admit that
they are a pain in the neck to get to stay glued in place until the glue sets.
More about that later.
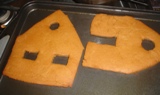
Step 16 - Pop them into the oven
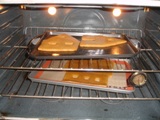 Now
pop the tray into the oven and let it cook for 12 to 15 minutes, until it puffs
up a little bit and just starts to become golden and slightly firm. While
one tray is baling, you can cut out the next patterns.
Now
pop the tray into the oven and let it cook for 12 to 15 minutes, until it puffs
up a little bit and just starts to become golden and slightly firm. While
one tray is baling, you can cut out the next patterns.
Then remove the cooked batch and let cool!
Another tip about the cooked dough. It's easy to trim it when it is fresh from the oven, still warm and soft, so you can trim some defects then. But even after it cools completely, it's still pretty easy to trim it with a sharp pair of kitchen shears or a firm, sharp knife that won't bend under pressure. You use a pizza roller or sharp knife to mark lines on the sections just after they are baked, to make shingles and other designs. And you can do it before baking, but they won't be as well defined.
Making the Icing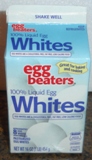
The icing is your mortar and glue, as well as decoration and trim!Ingredients:
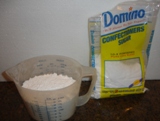
- 4 egg whites - If you use pasteurized eggs whites, like those in the carton at right, then the icing will be safe to eat (otherwise, the uncooked eggs may contain salmonella!)
- 1/2 teaspoon cream of tartar
- 4 cups of confectioner's sugar (also called icing sugar or powdered
sugar)
Step 17 - Beat the egg whites
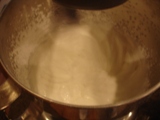 In a large bowl
(I like standing electric mixer, like a KitchenAid) beat the egg whites until they begin to foam. Add the cream of
tartar and beat until the whites are stiff but not dry.
In a large bowl
(I like standing electric mixer, like a KitchenAid) beat the egg whites until they begin to foam. Add the cream of
tartar and beat until the whites are stiff but not dry.
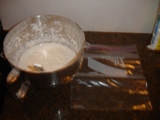 Gradually beat in the
icing sugar, beating for about 5 minutes until it reaches spreading consistency.
Keep it covered and refrigerated until needed.
Gradually beat in the
icing sugar, beating for about 5 minutes until it reaches spreading consistency.
Keep it covered and refrigerated until needed.

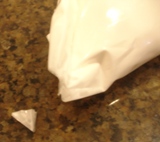
If you have a pastry bag, use that, but it's easy to take a large (1 gallon)
ziploc bag. Fill the bag, and pop it into the fridge. When you are ready
to use it, just cut off 1/4 inch of a corner and you have an instant pastry bag!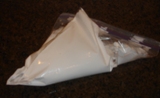
Construction - Call "Bob the Builder"
Nah! It's not hard - it only requires ONE thing: time to let the "mortar" dry after you assemble the 4 walls and roof. You can't hurry it. Well, there is one trick I'll show you, but you must let the icing harden befoe you start to deocrate!
Step 18 - Put icing on the seams
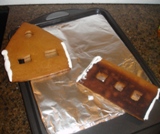 Start
by laying a bead of icing down along all the seams of the sides, walls and roof.
Just like with real glue, it will stick faster and hold better, if we coat the
seams where they will connect and let them dry until they are tacky.
Start
by laying a bead of icing down along all the seams of the sides, walls and roof.
Just like with real glue, it will stick faster and hold better, if we coat the
seams where they will connect and let them dry until they are tacky.
Step 19 - Connect 2 walls, and then the next, the fourth
and the the roof!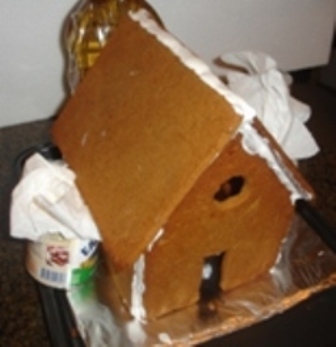
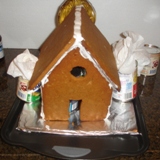 Start
with a side wall and the end. Stick them together and while one person holds
them in place, use your pint or quart jars (filled with contents) to hold them
in place. Use whatever you have handy: spaghetti sauce jars, jam, soda
cans, as long as it is heavy enough to hold the pieces in place. Add the other
end and side, and then the roof pieces.
Start
with a side wall and the end. Stick them together and while one person holds
them in place, use your pint or quart jars (filled with contents) to hold them
in place. Use whatever you have handy: spaghetti sauce jars, jam, soda
cans, as long as it is heavy enough to hold the pieces in place. Add the other
end and side, and then the roof pieces.
There's really no trick to it other than:
- Use lots of icing and add more as it dries if gaps appear.
- Keep the whole thing steady and untouched while it hardens
If the jars and cans are exactly the correct size, use wads of paper towels to build them up. You'll notice I did that to hold the roof pieces in place. The overhangs rest on the cans. I used paper towels to build the cans up so the roof pieces are pushed tight together
Step 20 - Construct the chimney
 The
chimney will be a lot easier to attach to the roof if it is already assembled
and hardened. Trust me. I tried assembling and gluing it at the same time. It
will make a saint curse....
The
chimney will be a lot easier to attach to the roof if it is already assembled
and hardened. Trust me. I tried assembling and gluing it at the same time. It
will make a saint curse....
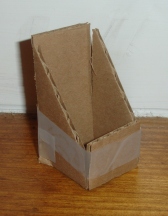
So, having done it the wrong way, I constructed a model of cardboard (see photo at left) to show you the RIGHT way. Using some ordinary adhesive tape, wrap the pieces into the shape shown (the chimney is upside down). Then pour icing down the inside along all four joints.
Let it harden along with the rest (next step)
Step 21 - Let it dry and harden!
Now, in a warm, not too humid room, it should be hard enough to work on in about 4 to 6 hours. Overnight is really best.
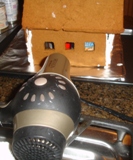 BUT,
if you ARE in a big hurry, here's a trick: aim a hair dryer set on cool and high
right at it. Hot won't work, because the icing will melt. But cool
will cause it to dry more quickly!
BUT,
if you ARE in a big hurry, here's a trick: aim a hair dryer set on cool and high
right at it. Hot won't work, because the icing will melt. But cool
will cause it to dry more quickly!
Step 22 - Ice the roof (if you want a snow-covered roof)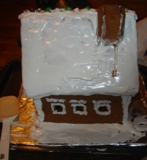 and then attach the chimney
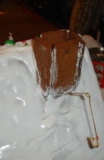
I wait to do the chimney until the walls and roof have hardened in place, preferably overnight.
You will notice I used a large safety pin, pushed gently into the roof, to hold the chimney in place while the icing hardens. Otherwise, the chimney will slowly slide down the roof!
To decorate the ging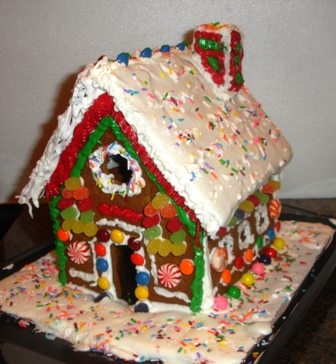 erbread
house
erbread
house
Ingredients and supplies:
- Gum drops,
- M&M's
- Life savers
- Other hard candies
- Colored "sprinkles" or "jimmies"
- Colored icings (comes in cans now!)
Step 23 - Decorating the house
Here's the fun part! Everyone can participate. Give each family member a wall or roof to do!
Go
wild! Icing around the door and windows makes nice trim. To apply candy decorations, dab a small amount of icing to the
underside of the candy and hold in place until set.
You can use dough scraps to roll out added decorative cut-outs to be
applied with icing glue. These cutouts can be impressed with designs
before baking. For example, you could make window shutters, doors, or
figurines! They can be "paint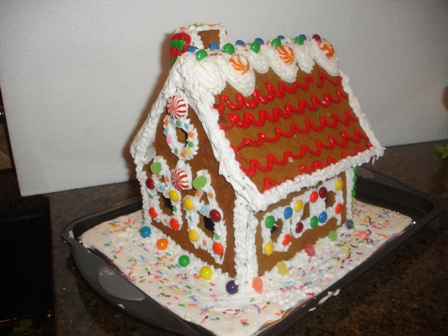 ed"
with colored icing.
ed"
with colored icing.
I found these little Marshmallow edible figurines at the Wal-Mart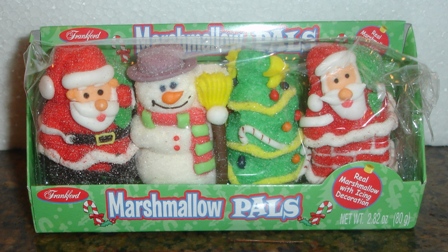 .
They are exactly the right size to be scaled for the house!
.
They are exactly the right size to be scaled for the house!
Write me to let me know how your house turned out and any tips you want to share . I hope you and the kids have fun! It should be a memorable experience!
Preserving your Gingerbread House
Yep, you can actually spray it with Shellac or lacquer (available from paint stores, Home Depot, Lowes and Wal-Mart) and it should last for years. Just be sure to let it dry completely first. I plan to do my after the holidays, when I am packing things up!
I'll forewarn you that humid environments are a killer for gingerbread houses - they will absorb the moisture and collapse. So it must be kept dry! In a humid area, you would need to seal in an airtight bag.
Feedback, Comments and Tips
- Comments from a visitor on December 16, 2012: "Your gingerbread house directions were PERFECT!! This year with many thanks to your templates and instructions our family of six axed the store bought gingerbread kits and tackled our own homemade one! It went together even more smoothly than I ever dreamed it could with four children aged ten years and under! Many, many thanks for posting this incredible article!! :)"
- Comments from a visitor on December 28, 2011: "I was looking for an easy gingerbread house recipe and directions and I was led to your site. Thank you SO much. The directions are so clear and so far I've been successful. I still have to ice it together so we'll see!! I'm not really a good baker so I appreciate you putting the pattern, directions, etc on your site. My 7 year old daughter will have a wonderful decorating experience tomorrow and I've been able to experience something new without too much stress!
For Easter egg Hunts, Children's Consignment Sales, Local Farm Markets and other types of Farms, click here.
Find Other types of farms:
- Farm markets and roadside stands
- Road trips and camping resources
- Home canning supplies at the best prices on the internet!
- Maple Syrup Farms, sugarworks, maple syrup festivals
- Environmental information and resources
- Consumer fraud and scams information
- Farms For Your Event for birthday parties, weddings, receptions, business meetings, retreats, etc.
- Pick Your Own fruits and vegetable farms
- Festivals - local fruit and vegetable festivals
- Local Honey, apiaries, beekeepers
- Local Meat, Milk and Eggs
Get the
most recent version of
the Ball Blue Book